


What the tech is AR? (hehe)
Firstly, welcome to my very first tutorial! Before we start, we need to understand what the heck AR is. If you already know, congratulations, if you want, you can skip to the start of the tutorial. For the rest of you, don't be fooled, AR isn't just a pirate's way of saying yes(terrible joke, I'm sorry). AR is a fast-growing technology that will be taking over our daily lives sooner than any of us think.
So what is AR? It's augmented reality. Now, watch out, this can be easily confused with VR(Virtual Reality). If you really want to dumb it down, one is an augmented reality, meaning it only adds to what we already see, the other one being virtual reality, basically replacing reality. Simply put, one is an augmentation, one is a replacement. But why does this matter? Why do we need to care about this? Well, first and foremost, the pure potential of AR is underrated. The number of uses and capabilities AR can bring to the table is limitless. The only thing holding us back is the hardware. If you think back to every other technological advancement like smartphones, computers, and the current state of VR, it all has to start somewhere... In someone's basement probably.
The very first Motorola phones came out in 1973! Like what? At that time, my parents haven't even met yet... It took almost half a century to replace analog controls with the worthwhile tactile gesture-sensitive screens we have today. With today's sudden shift into AR technology, its origin will share the same story as phones. If we follow the way phones progressed, AR will start by being overpriced, unobtainable, inefficient, and ugly, but with time, research and passion, AR will turn into something beautiful. Without knowing it, AR will be the leading technology that'll quickly replace phones. I can guarantee it. So with that said, build some cool stuff. The more people we have working on this fairly new tech, the more we evolve the technology into something that'll be remembered as a revolutionary upbringing, just like the smartphone.
When Henry Ford made cheap, reliable cars, people said, 'Nah, what's wrong with a horse?' That was a huge bet he made, and it worked. - Elon Musk
The tutorial
Firstly, before we start anything at all, you'll need:
- The most recent version of Xcode.
If you want to do any testing whatsoever, you'll need:
- An iPhone SE or newer(6, 7, 8, 9, X, and 11...).
Any versions prior to the iPhone SE aren't capable of using AR features
Creating the project
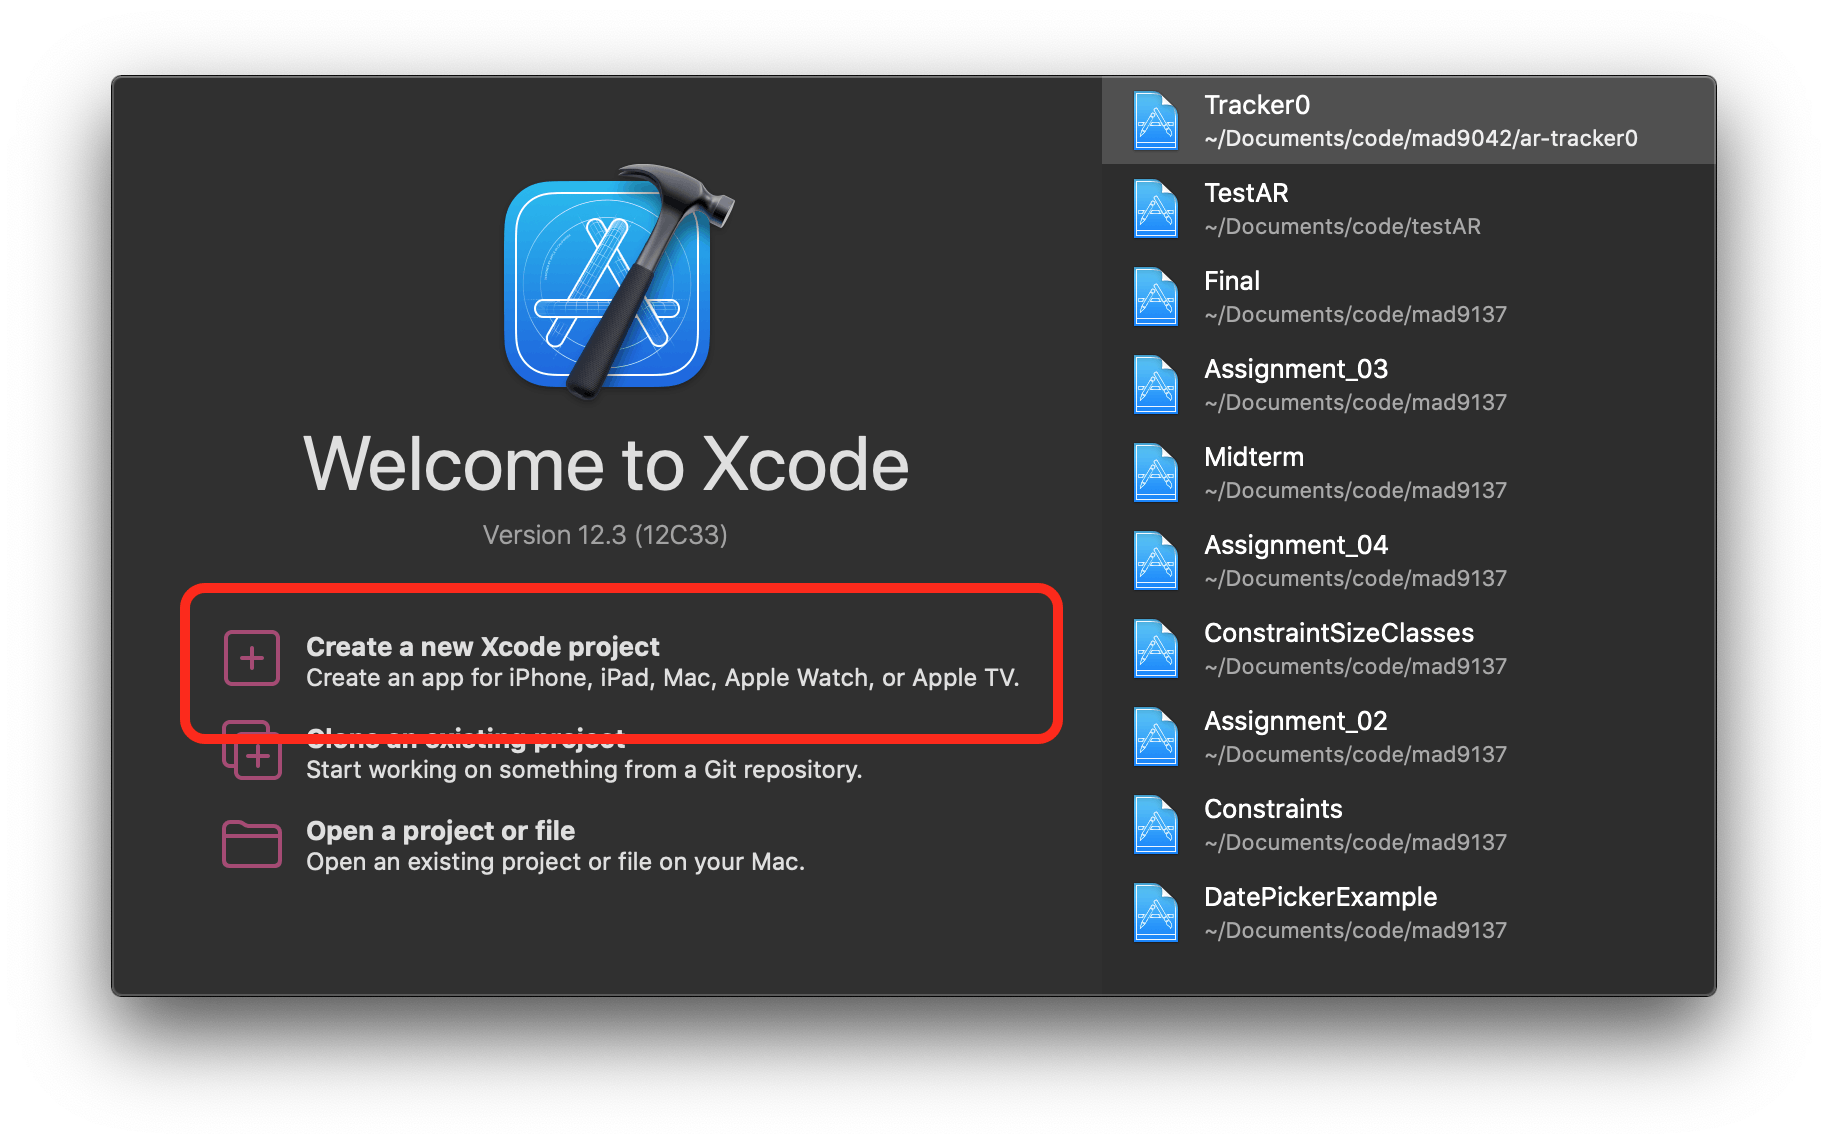
So to start off, launch Xcode and create a new project.
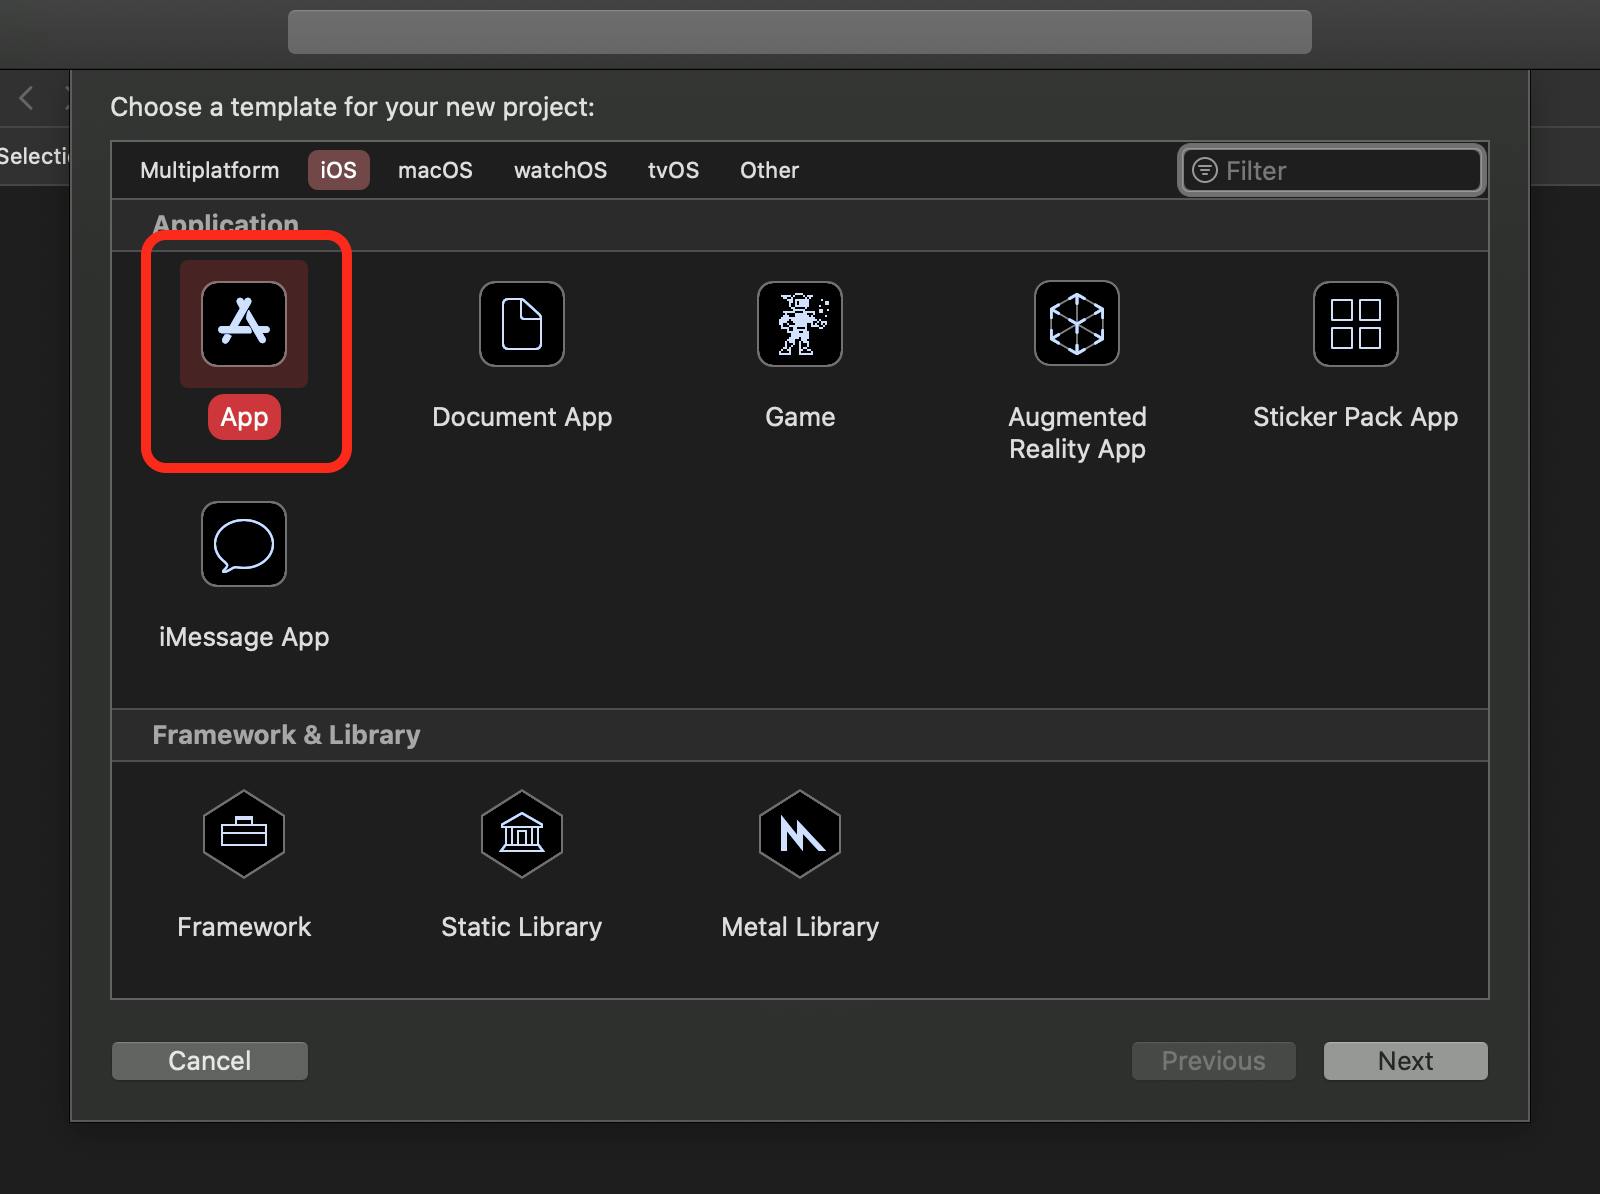
Once the project is created, in the iOS section, select App and press Next.
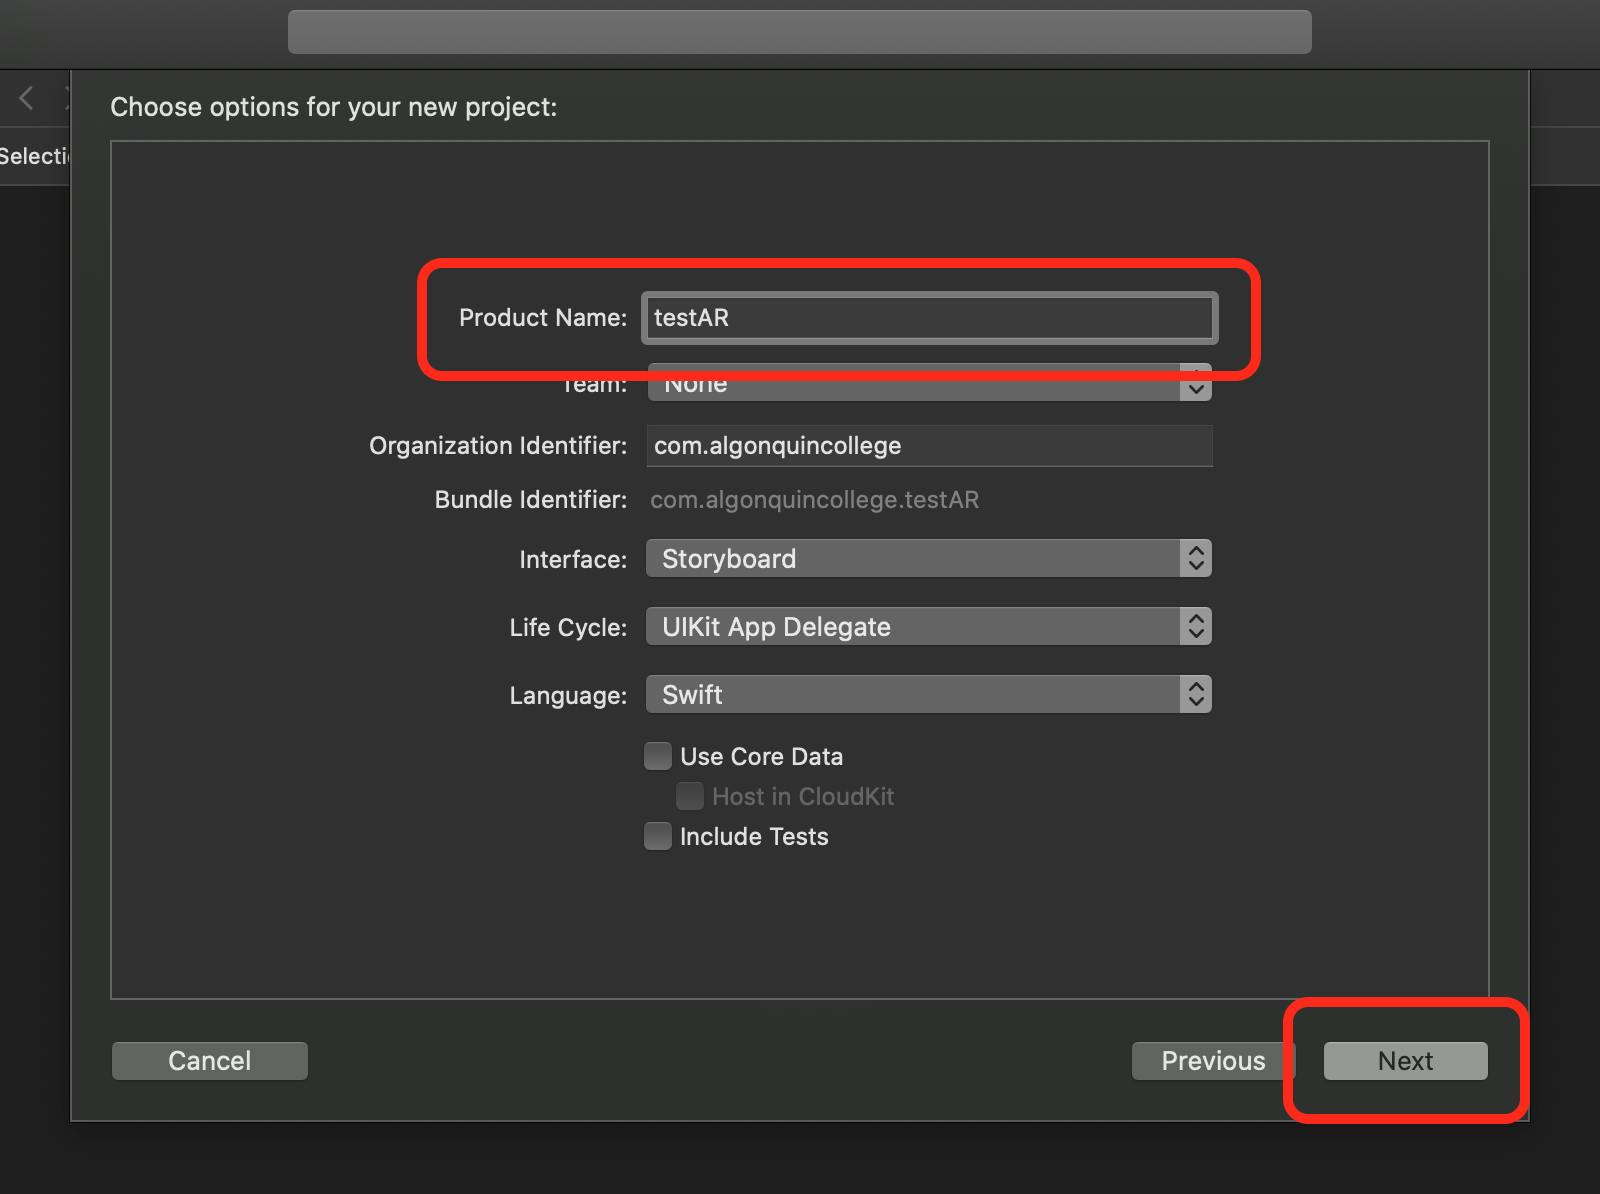
Name your project appropriately. I named mine testAR. Once named, press Next.
Adding assets to the project
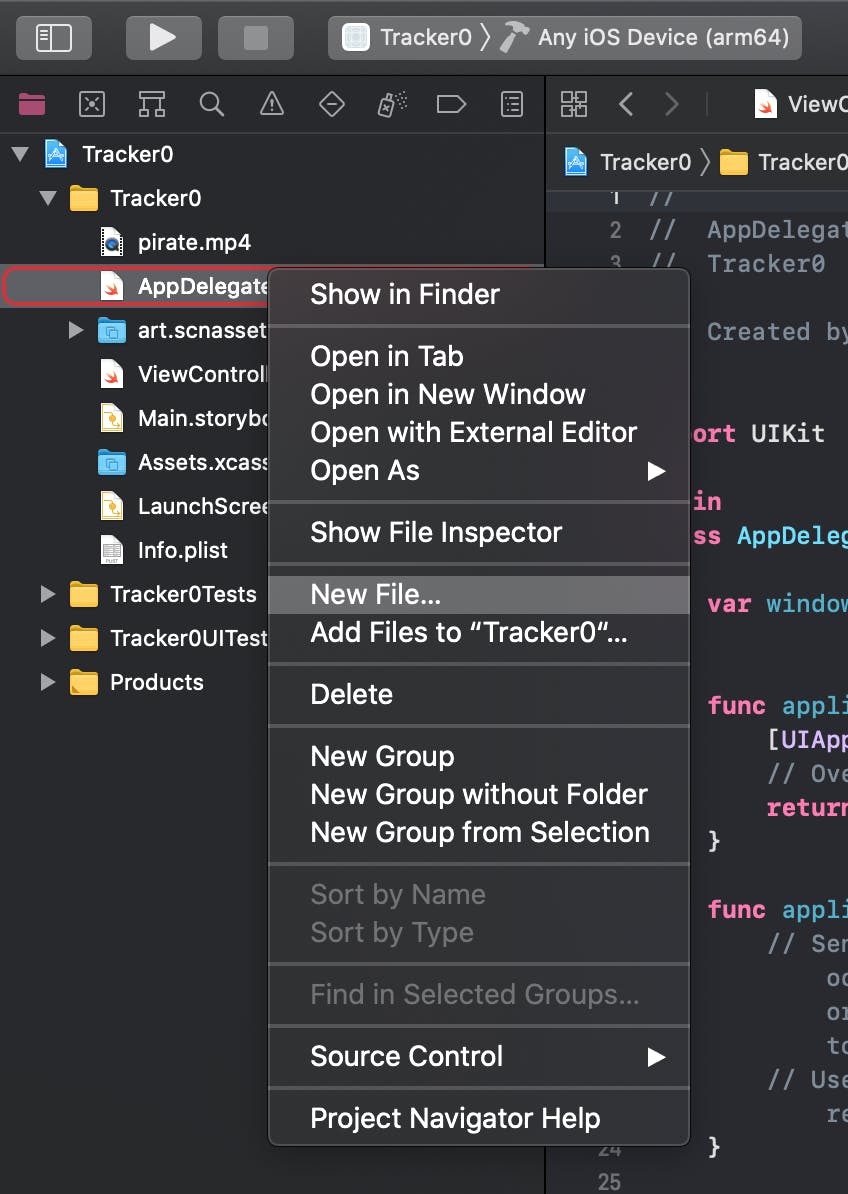
Xcode will create your project and open it. Once opened, right-click on any item within the project folder. Once the context menu opens, select New Item.... A prompt will appear.
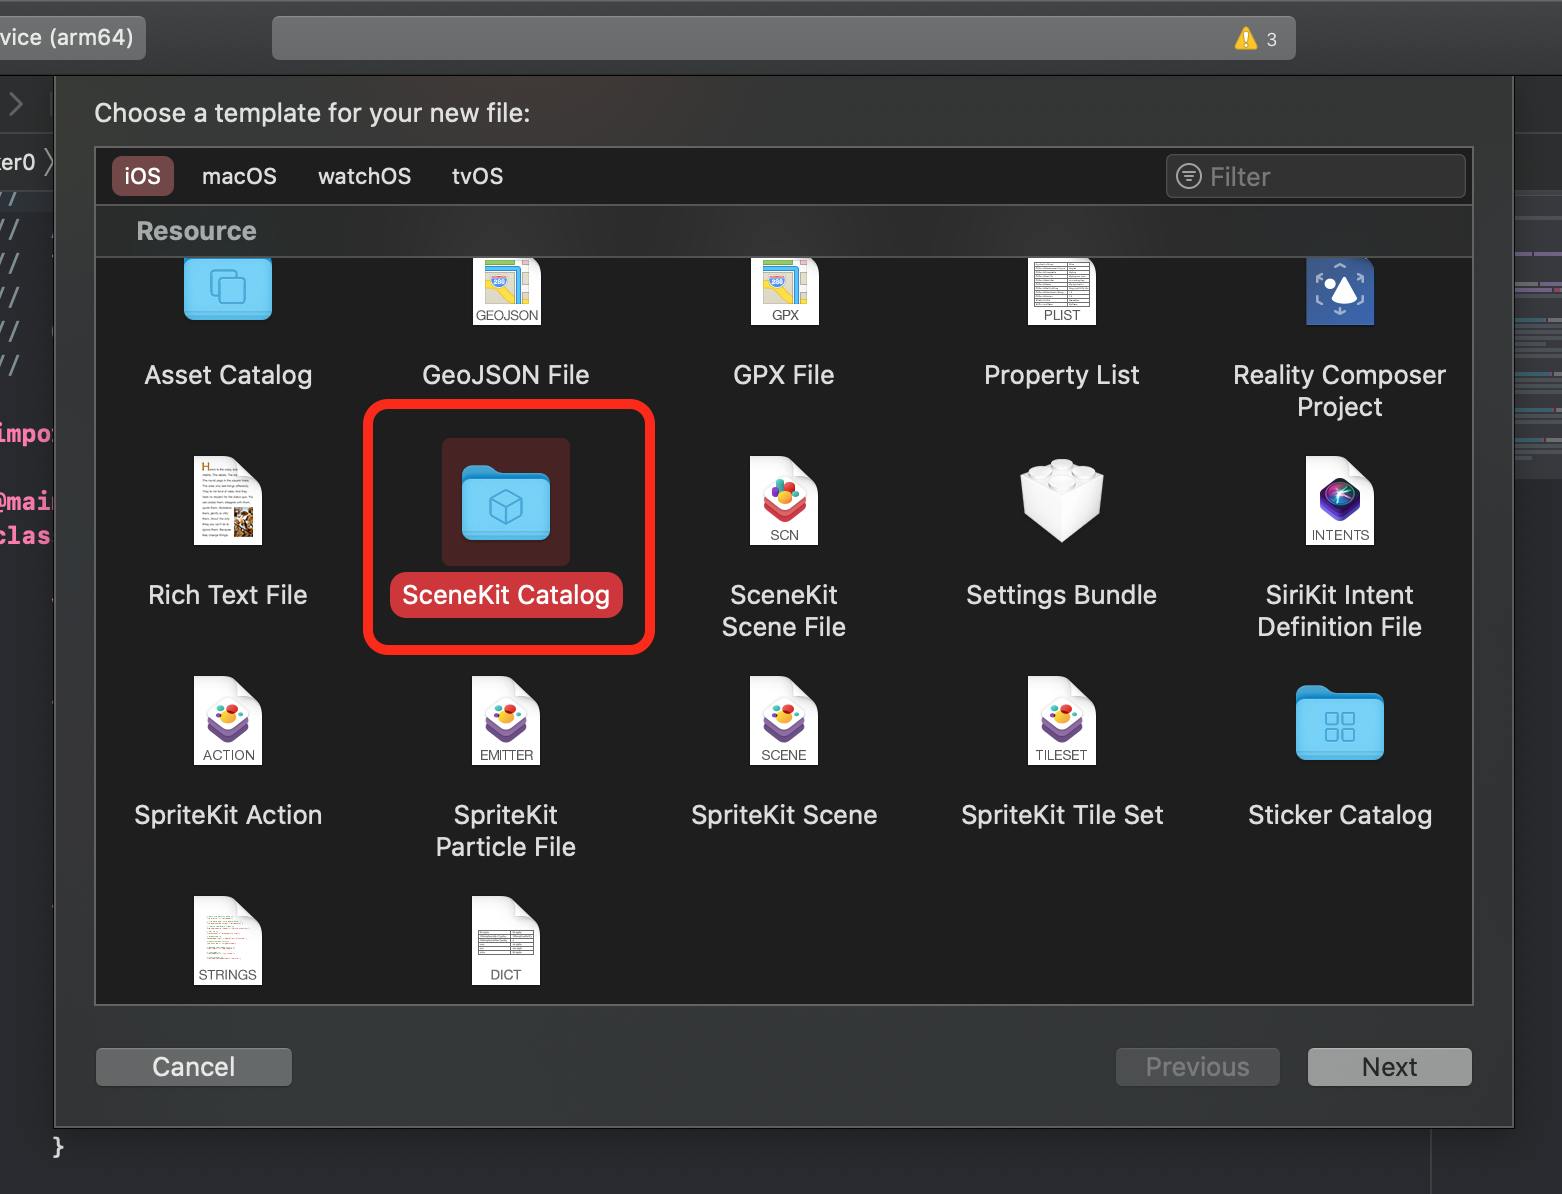
Scroll down on the initial window until you find SceneKitCatalog. Select the item and press Next.
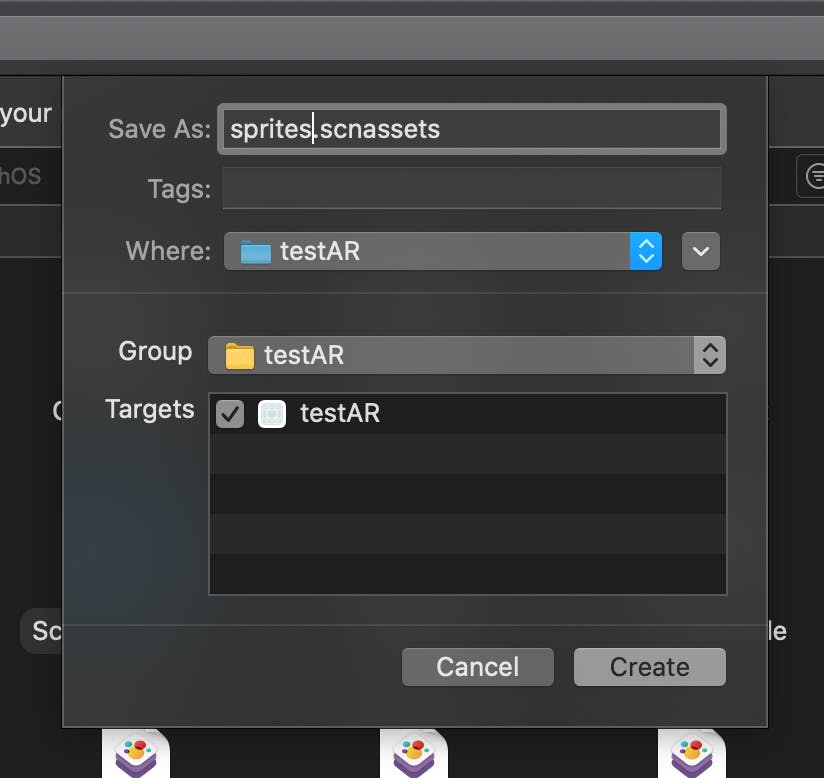
To the best of your abilities, give the folder a decent name. I called mine sprites. Once named, press Next.
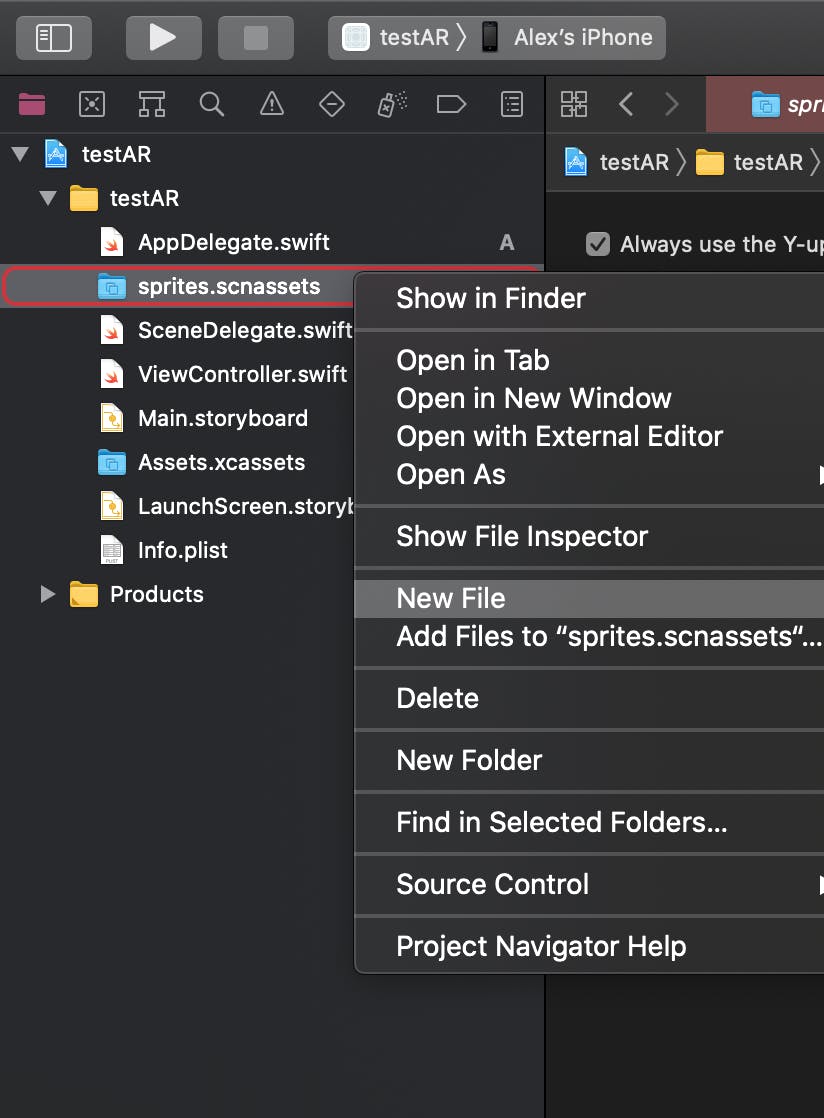
Once the folder is created, do the same as before, only right-click on the created folder this time.
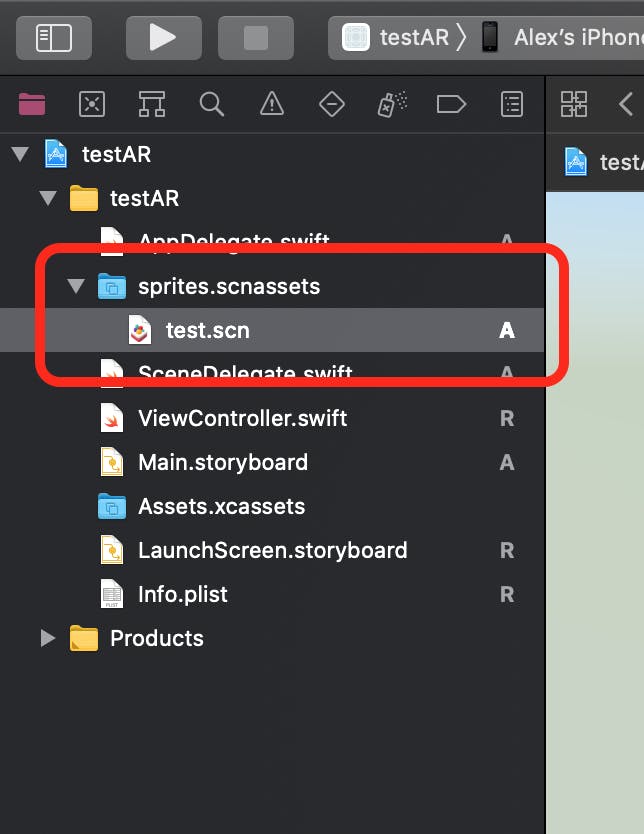
This time there won't be a prompt. Enter an appropriate name for your file. I named mine test. Now make sure you're currently editing that file. If you're not, double click on your new file to edit it.
You'll be presented with an empty stage. Yours won't have grid lines like mine. I recommend that you enable them to give yourself an easier time to understand what's going on. It's fairly simple to enable them.

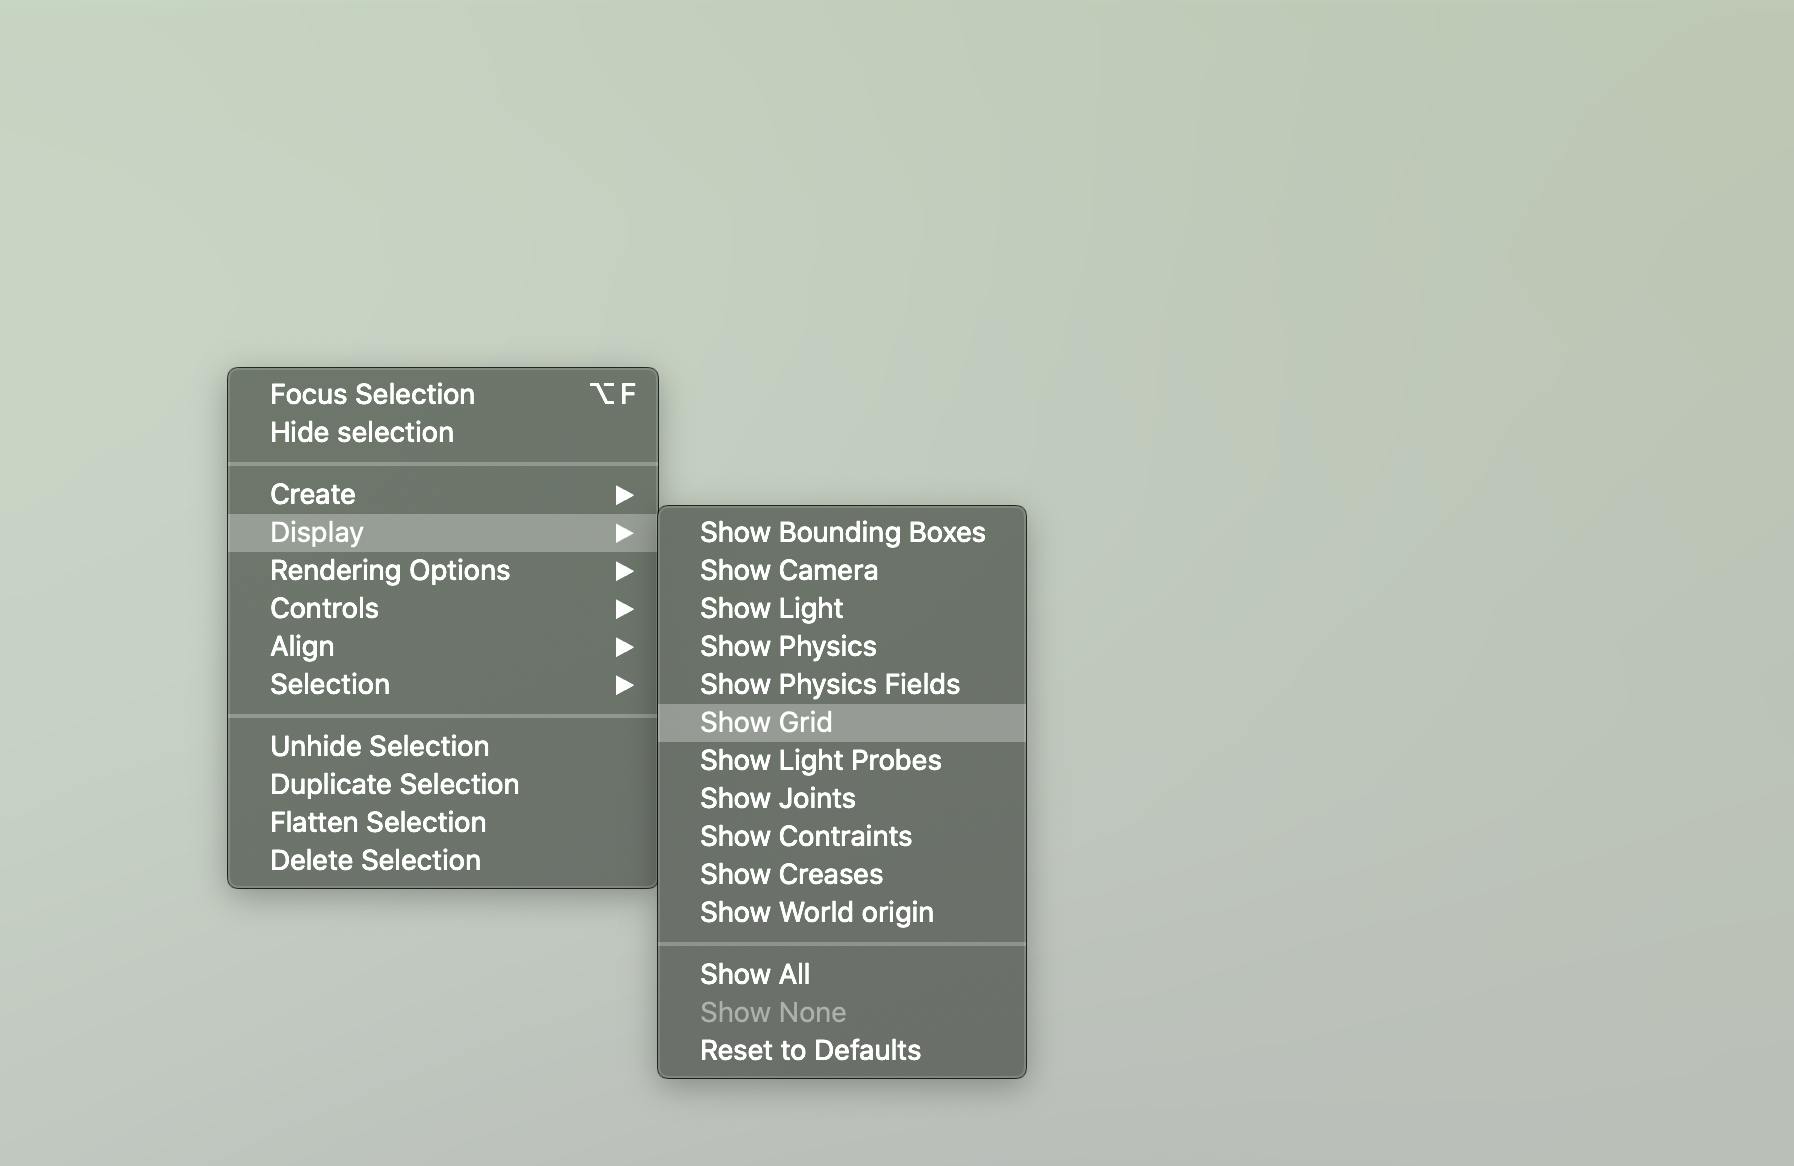
To enable the grids, right-click anywhere on the canvas to open the context menu. Once the menu opens, select Display and then select Show Grid.
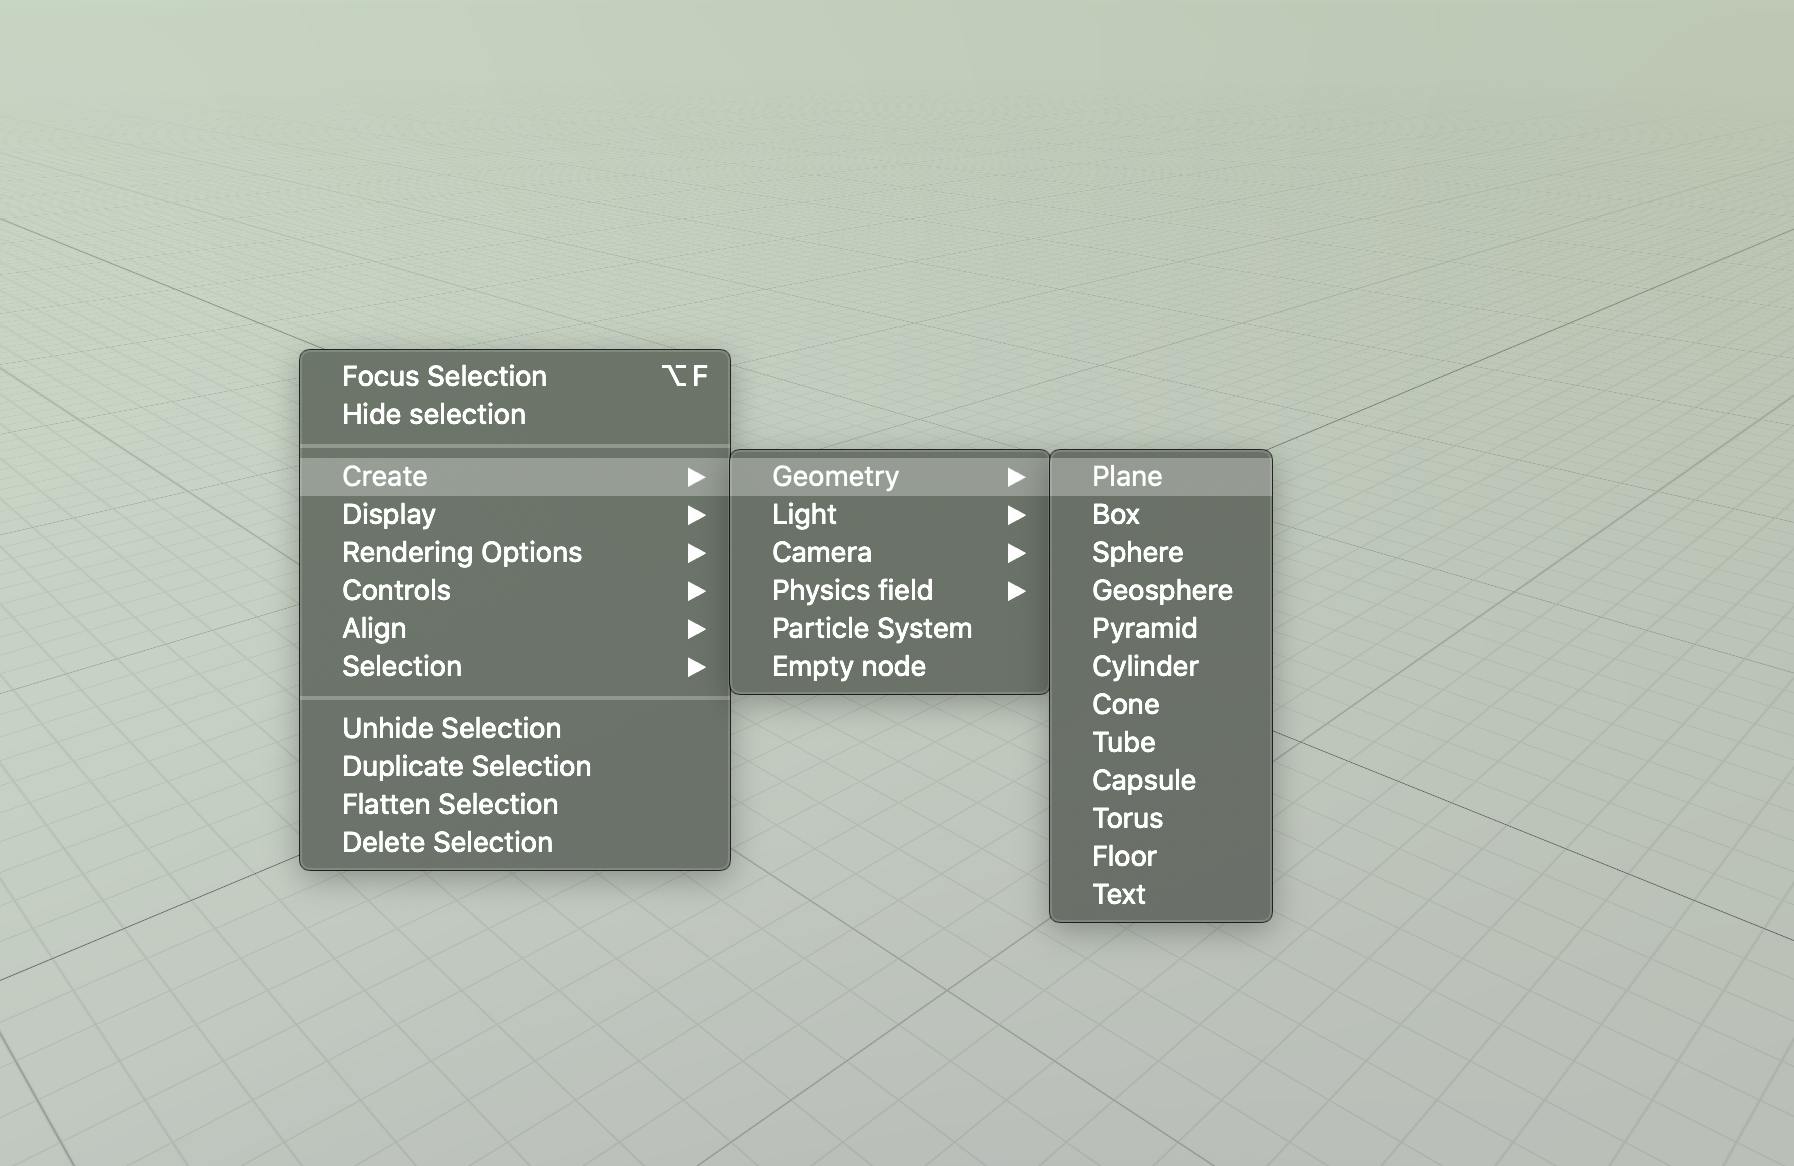
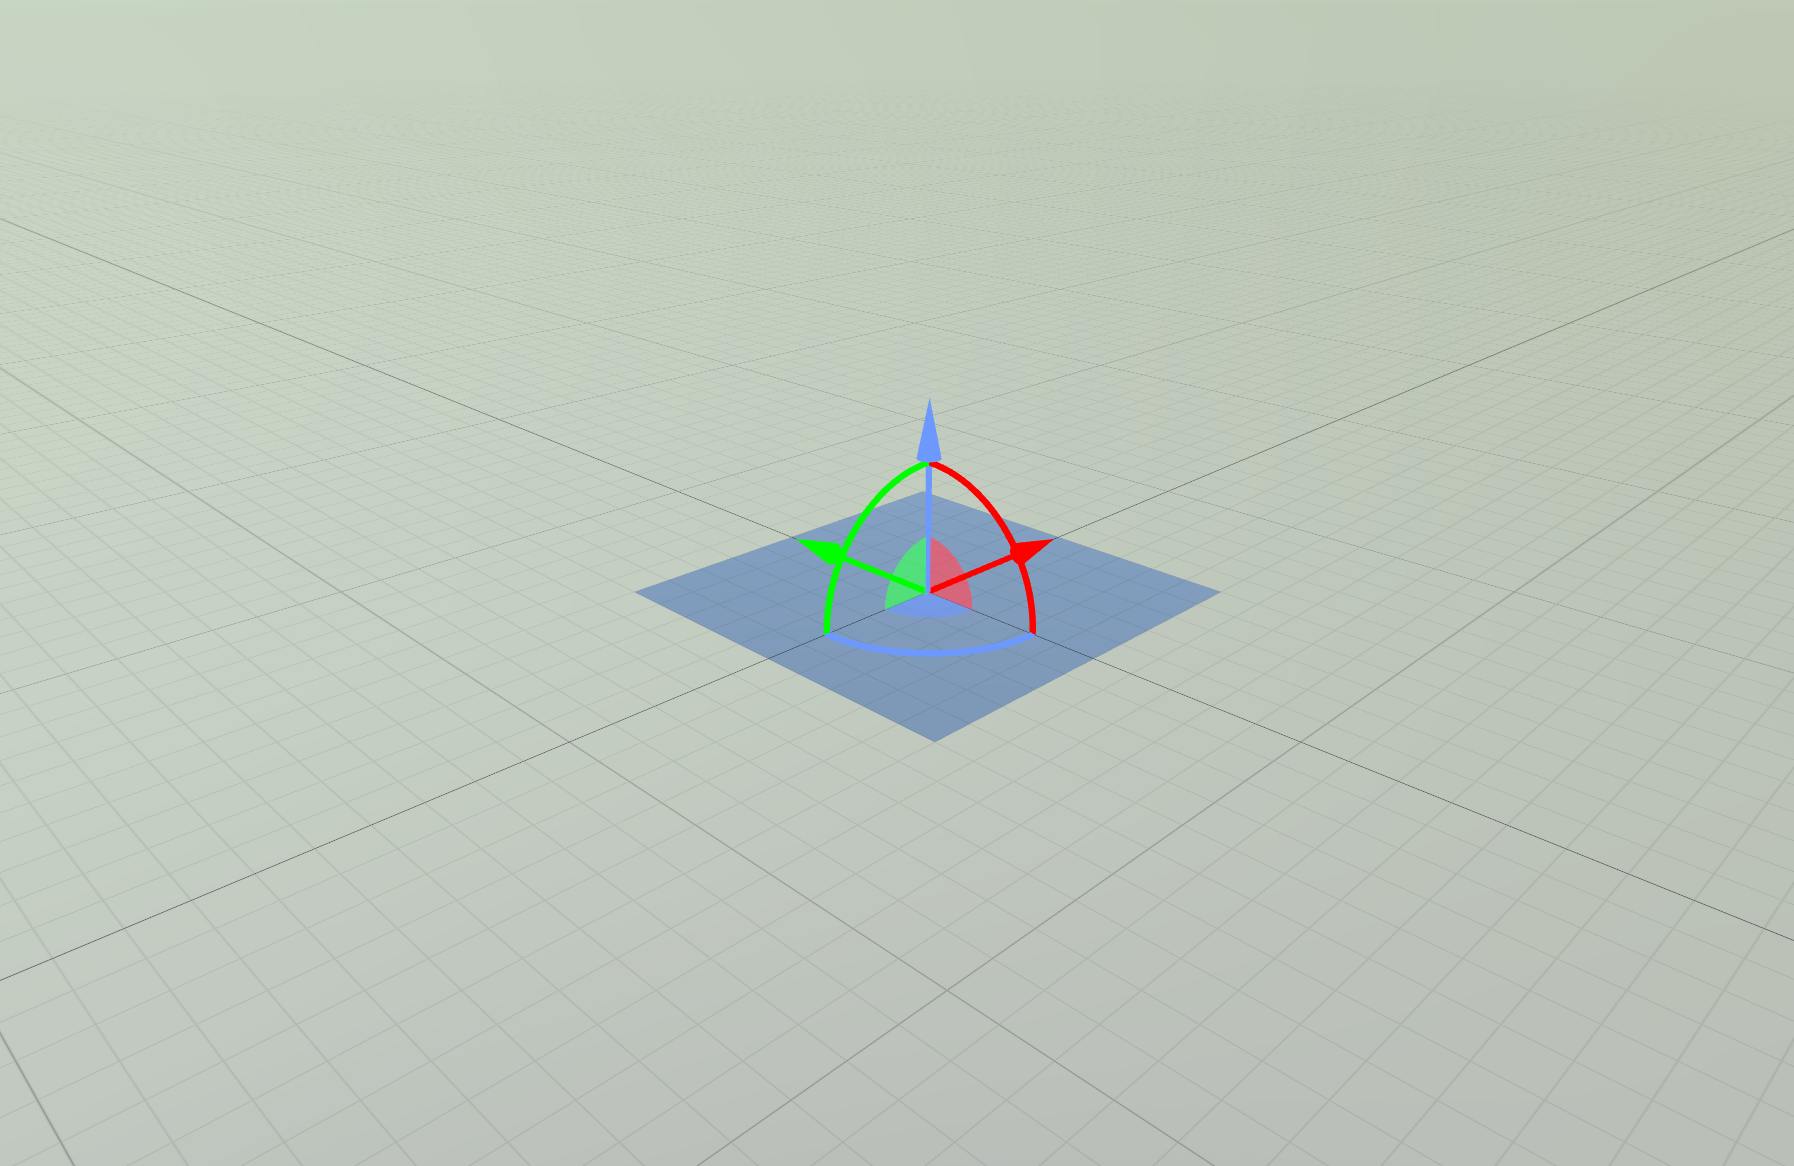
Now that you're ready to work, right-click on the canvas. Find and select Create, then hover over Geometry, then select Plane. Since we're working with image tracking, planes can be used to display media.
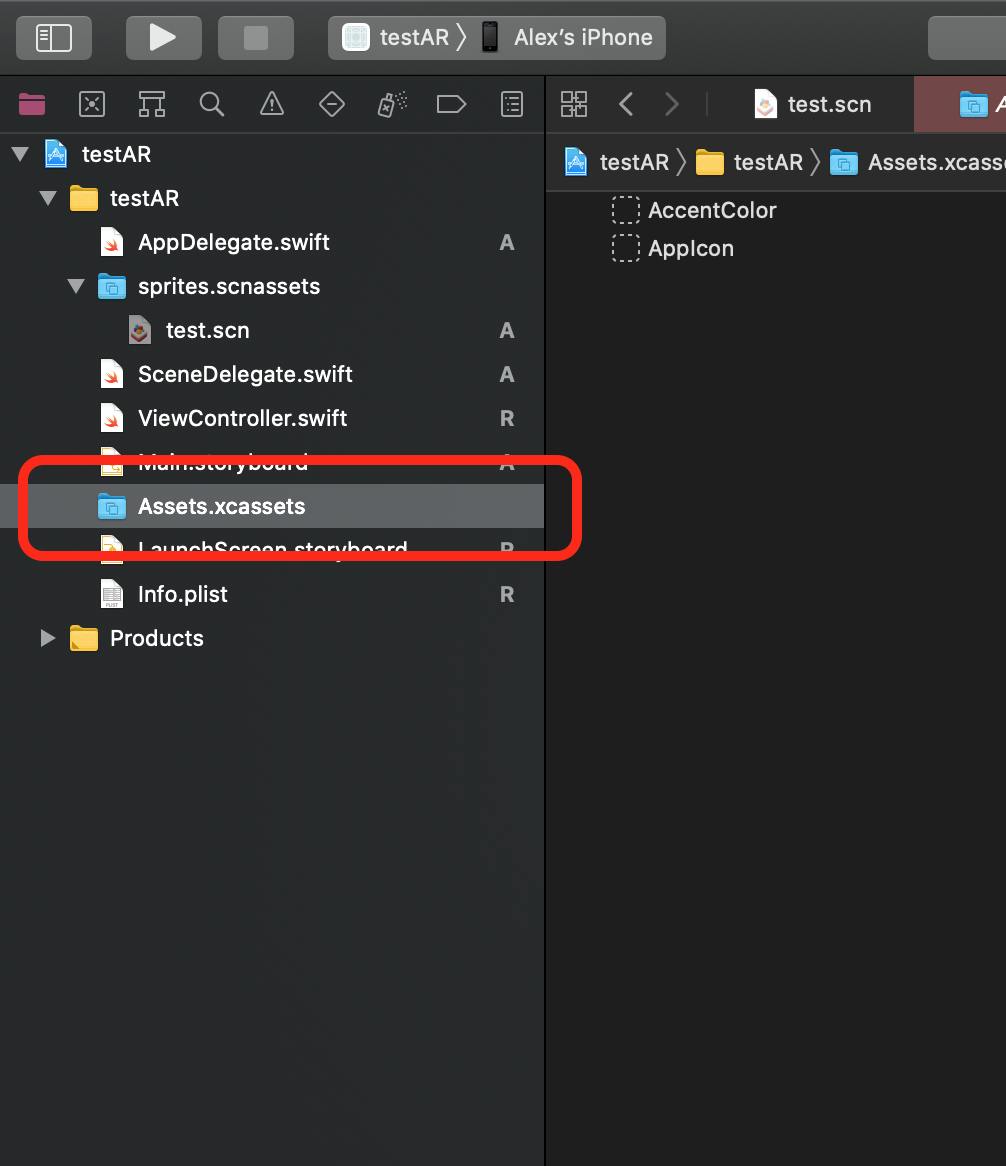
Time to upload your image(s)! Select Assets.xcassets which should be in your project files.
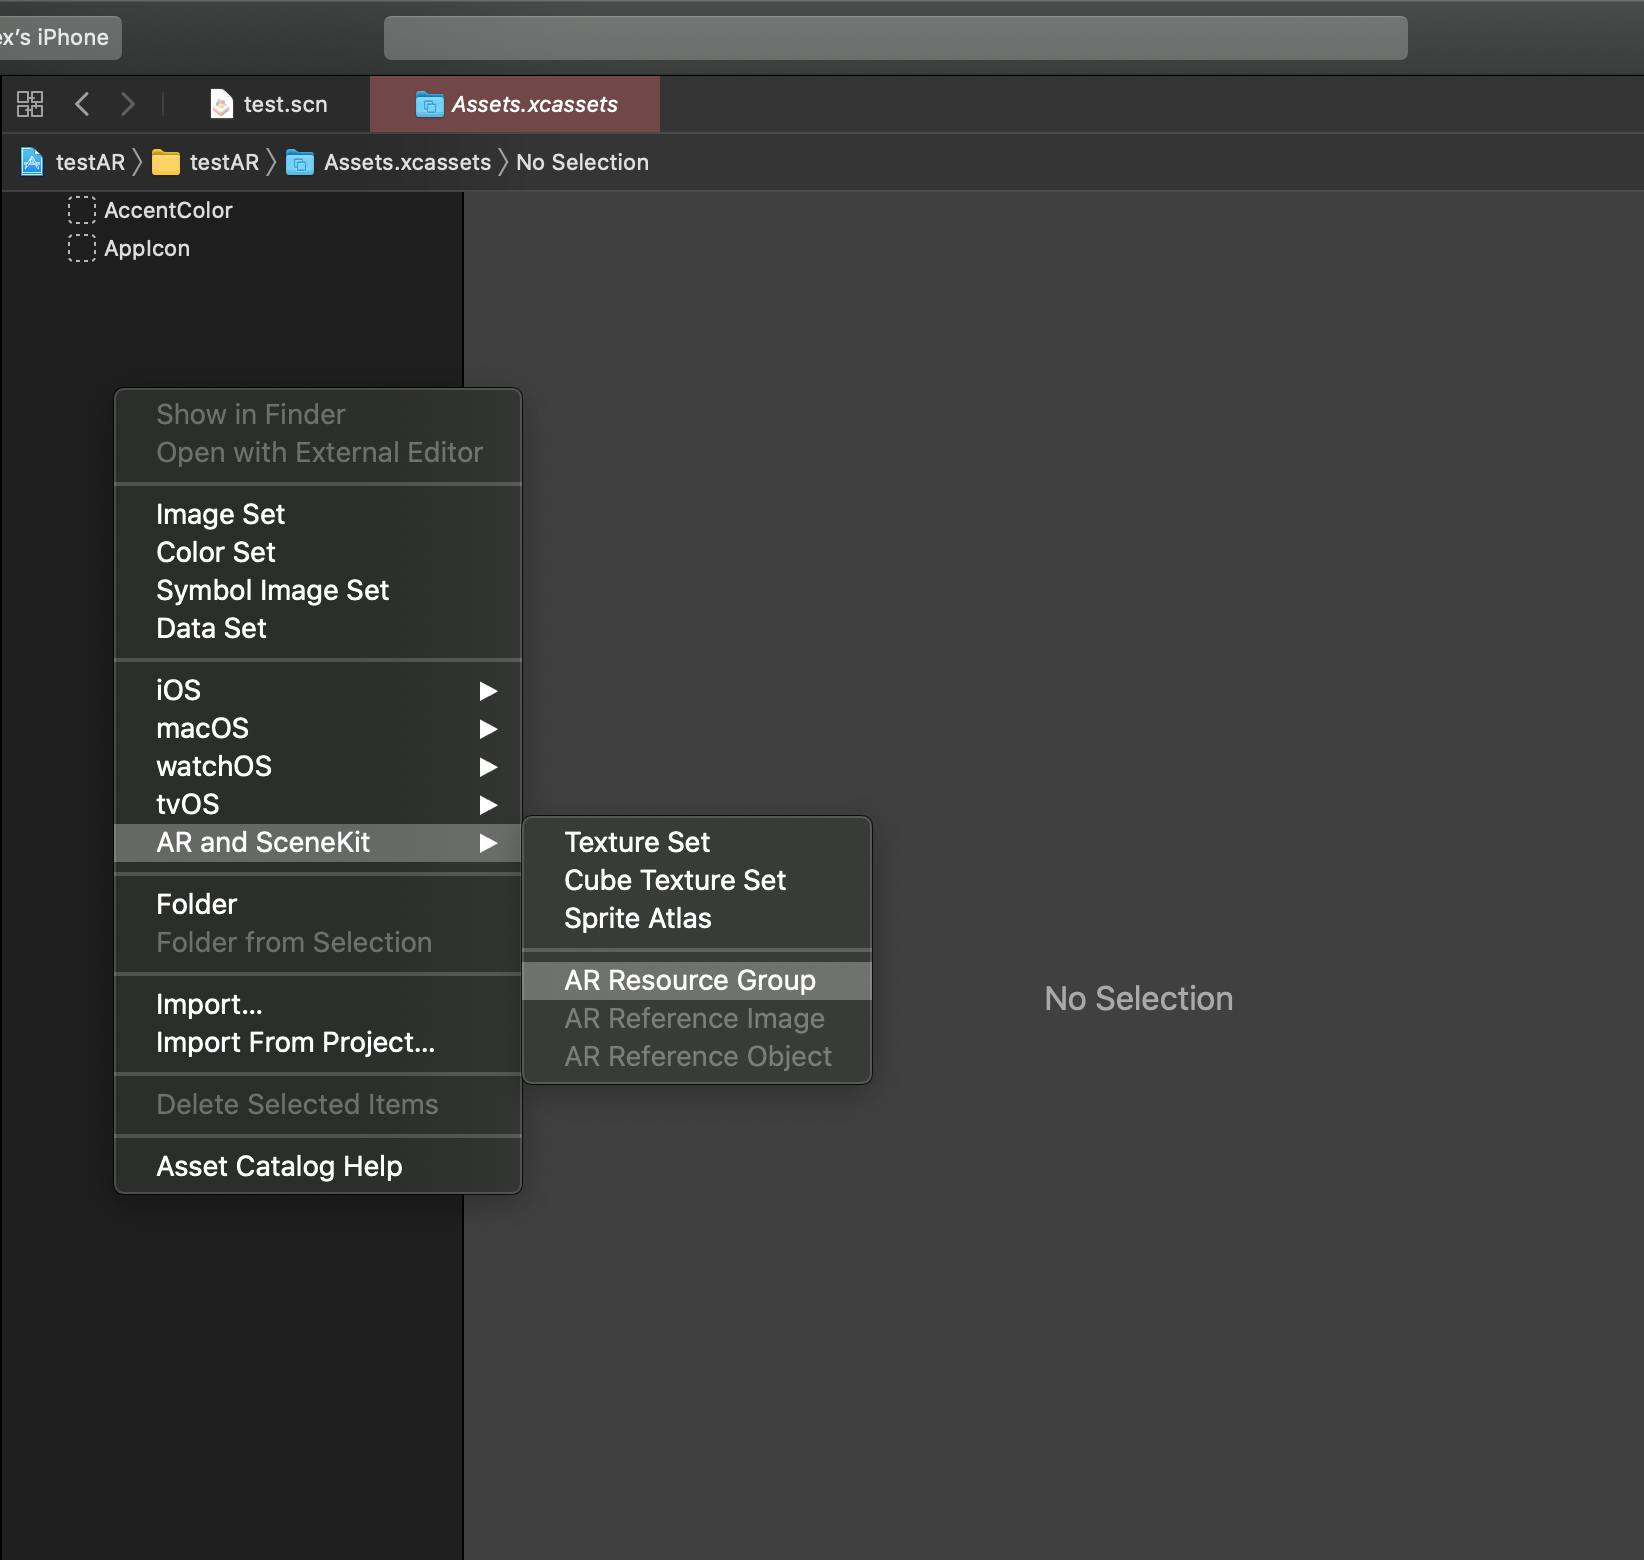
You should be presented with a relatively empty screen with an additional sidebar next to your project navigator. Right-click on that new sidebar. Once the context menu appears, hover over AR and SceneKit, then select AR Resource Group.
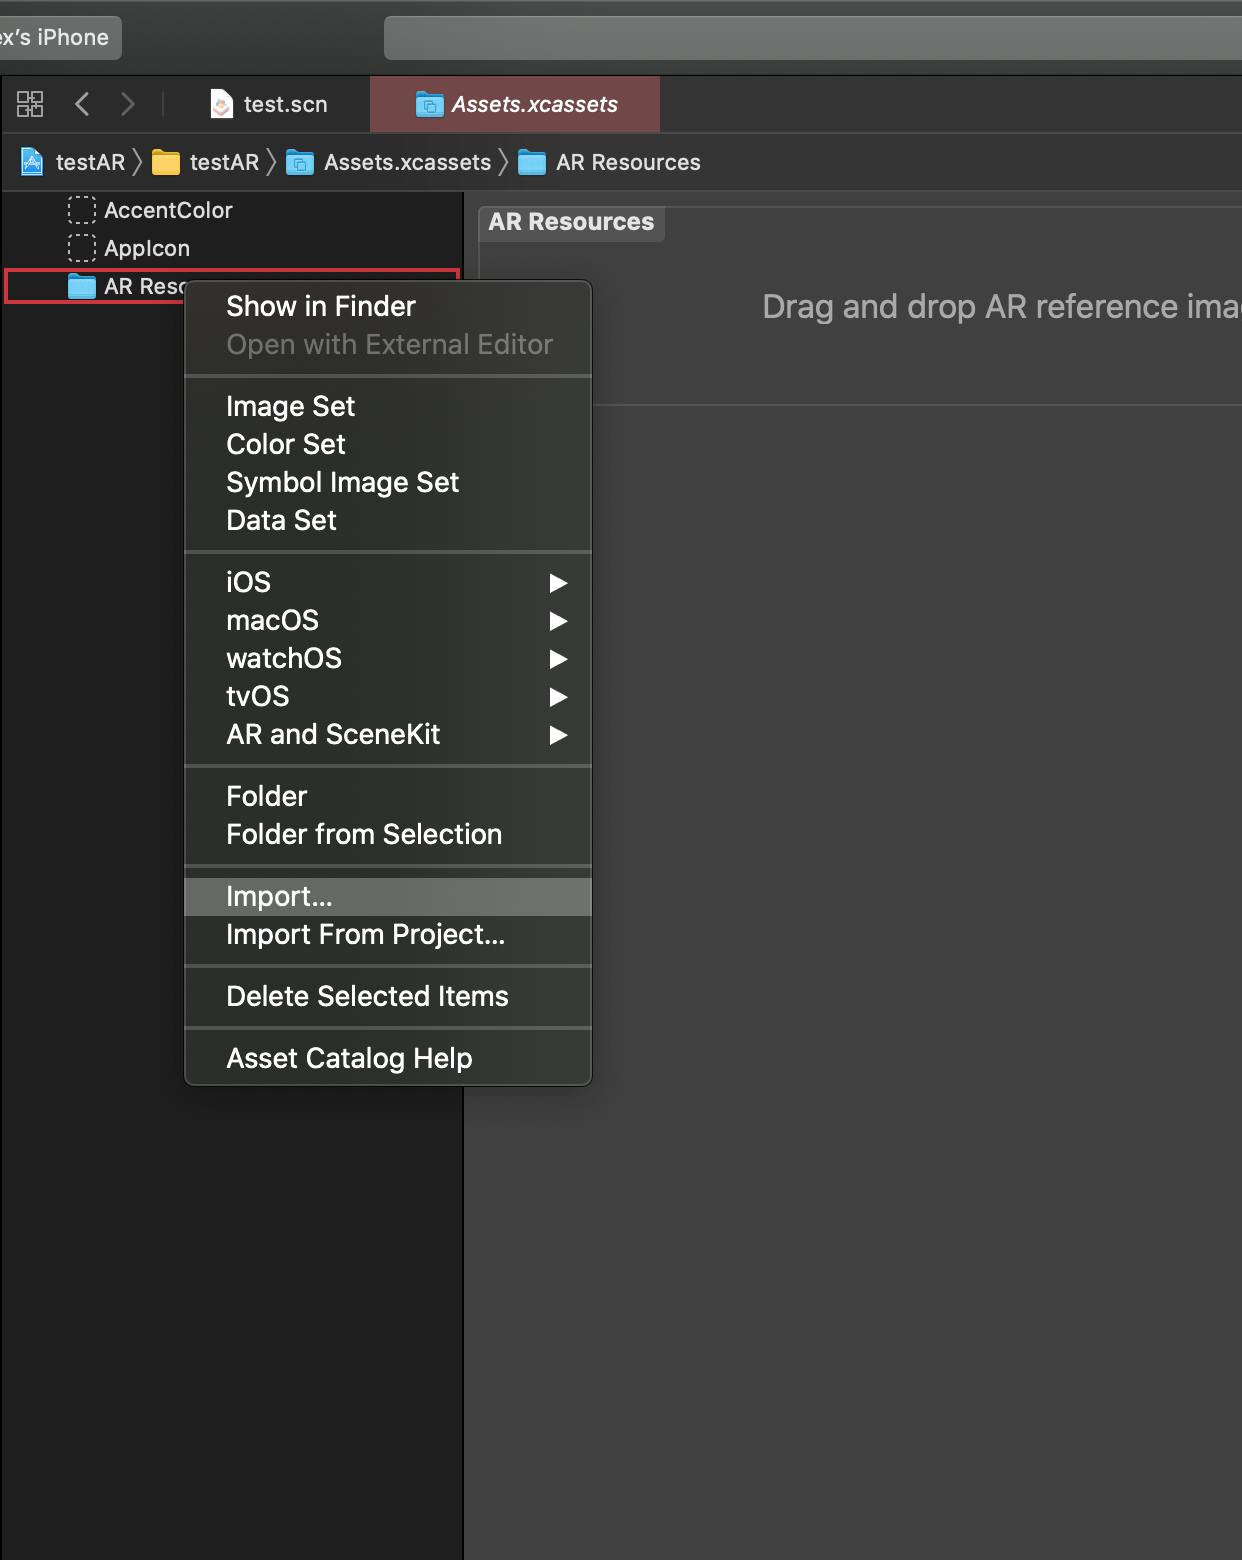
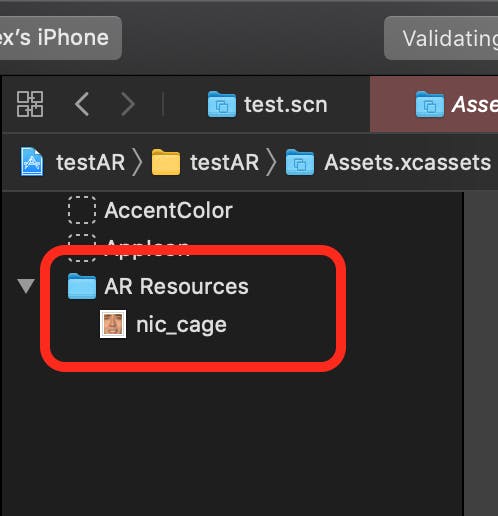
Once the folder is created, right-click on it, and select Import.... Select whatever photos you want the image tracker to detect. If there are any issues related to the image, Xcode will warn you. The warnings are pretty clear and easy to fix.
Prepping your storyboard
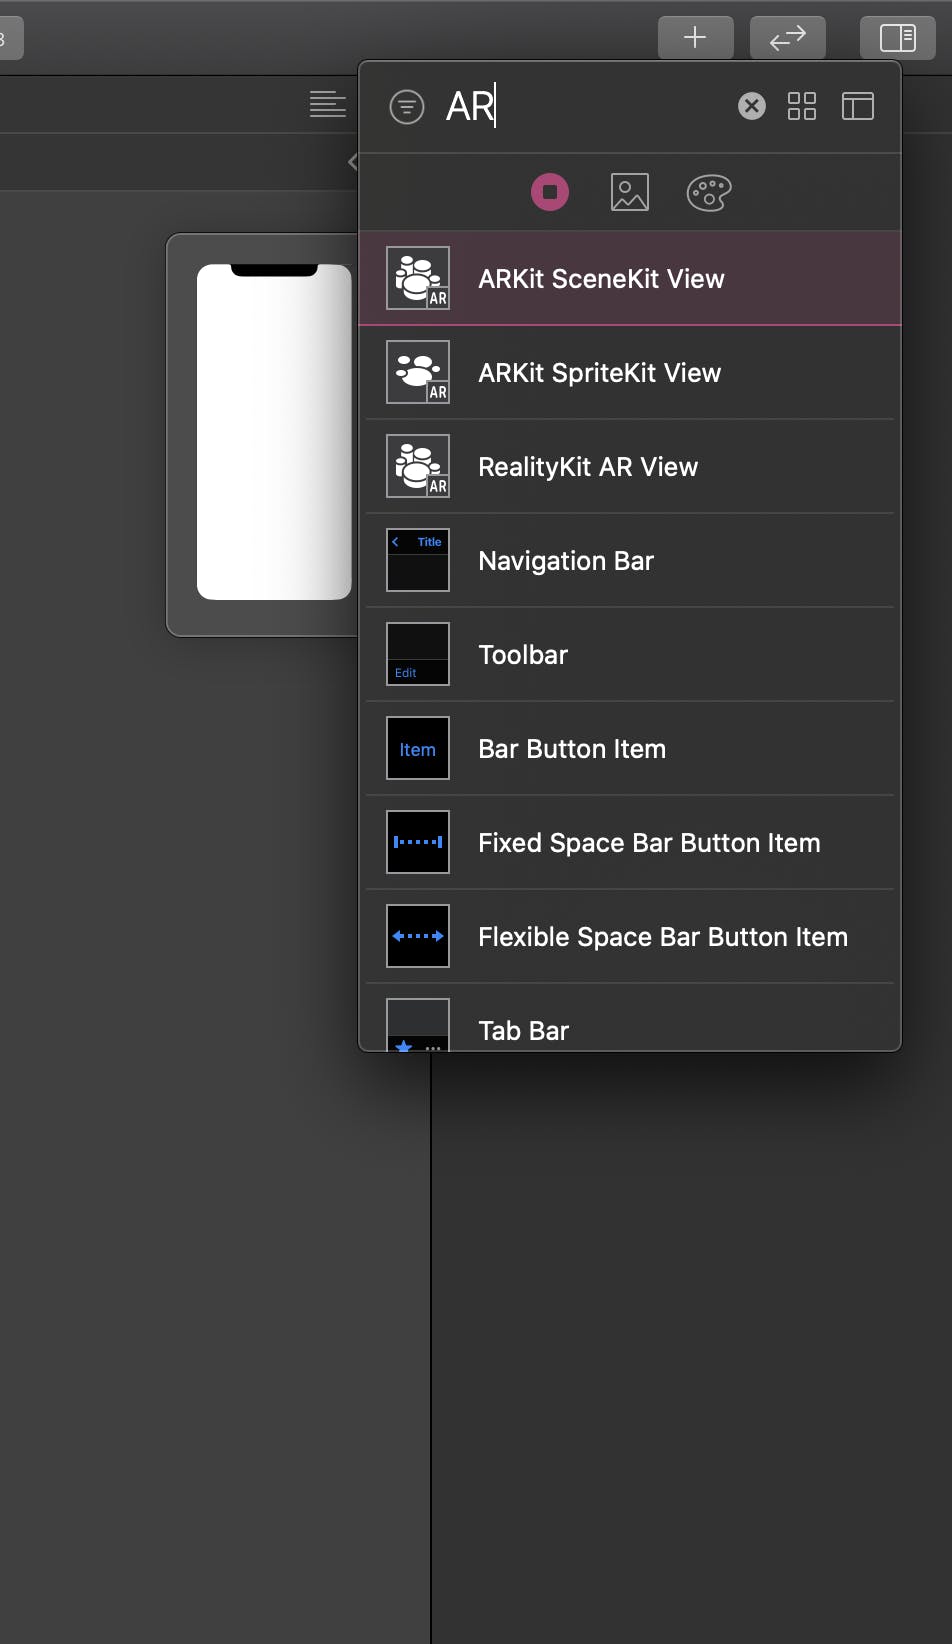
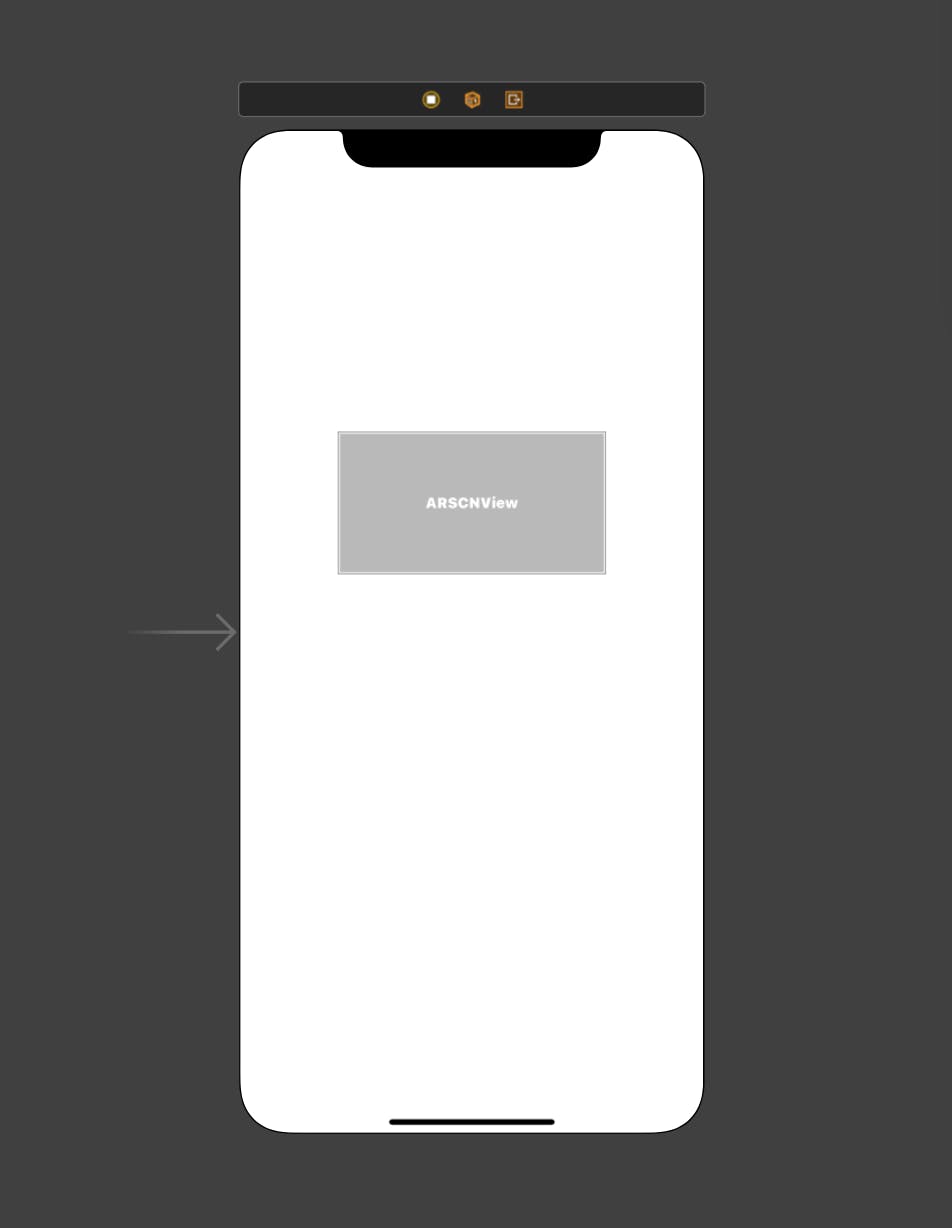
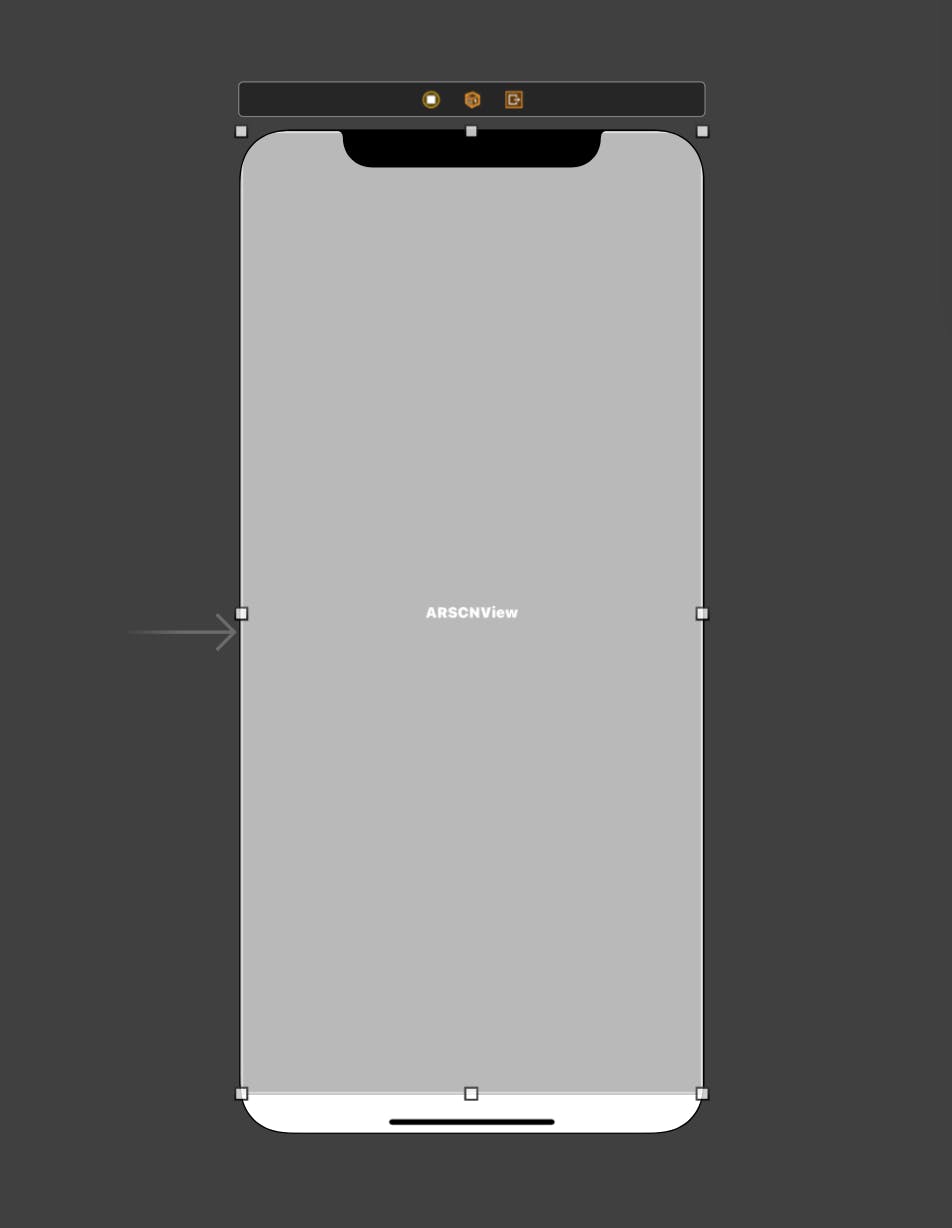
In Main.storyboard, you should see just an empty iPhone. Click on the + in the top right. Search AR. ARKit SceneKit View should be the first on the list. Click and drag the item onto your iPhone. Resize the view to fit the whole screen leaving some safe space at the bottom.
Side note, you should be setting up constraints for the view. You can find a guide online, they're everywhere!
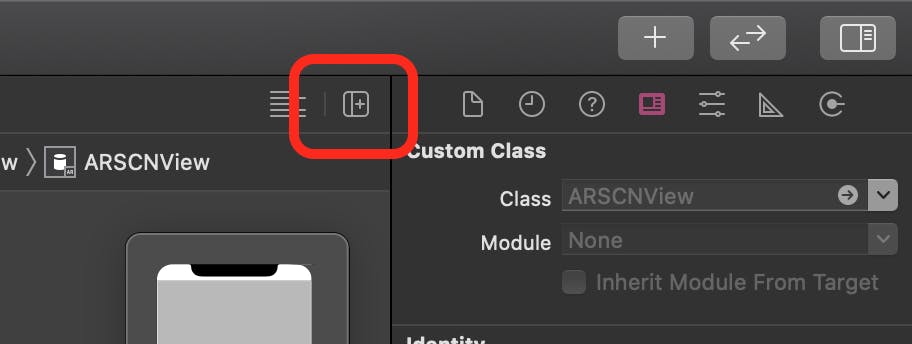
Using the split editor button in the top right, have both the ViewController.swift and Main.storyboard open simultaneously.
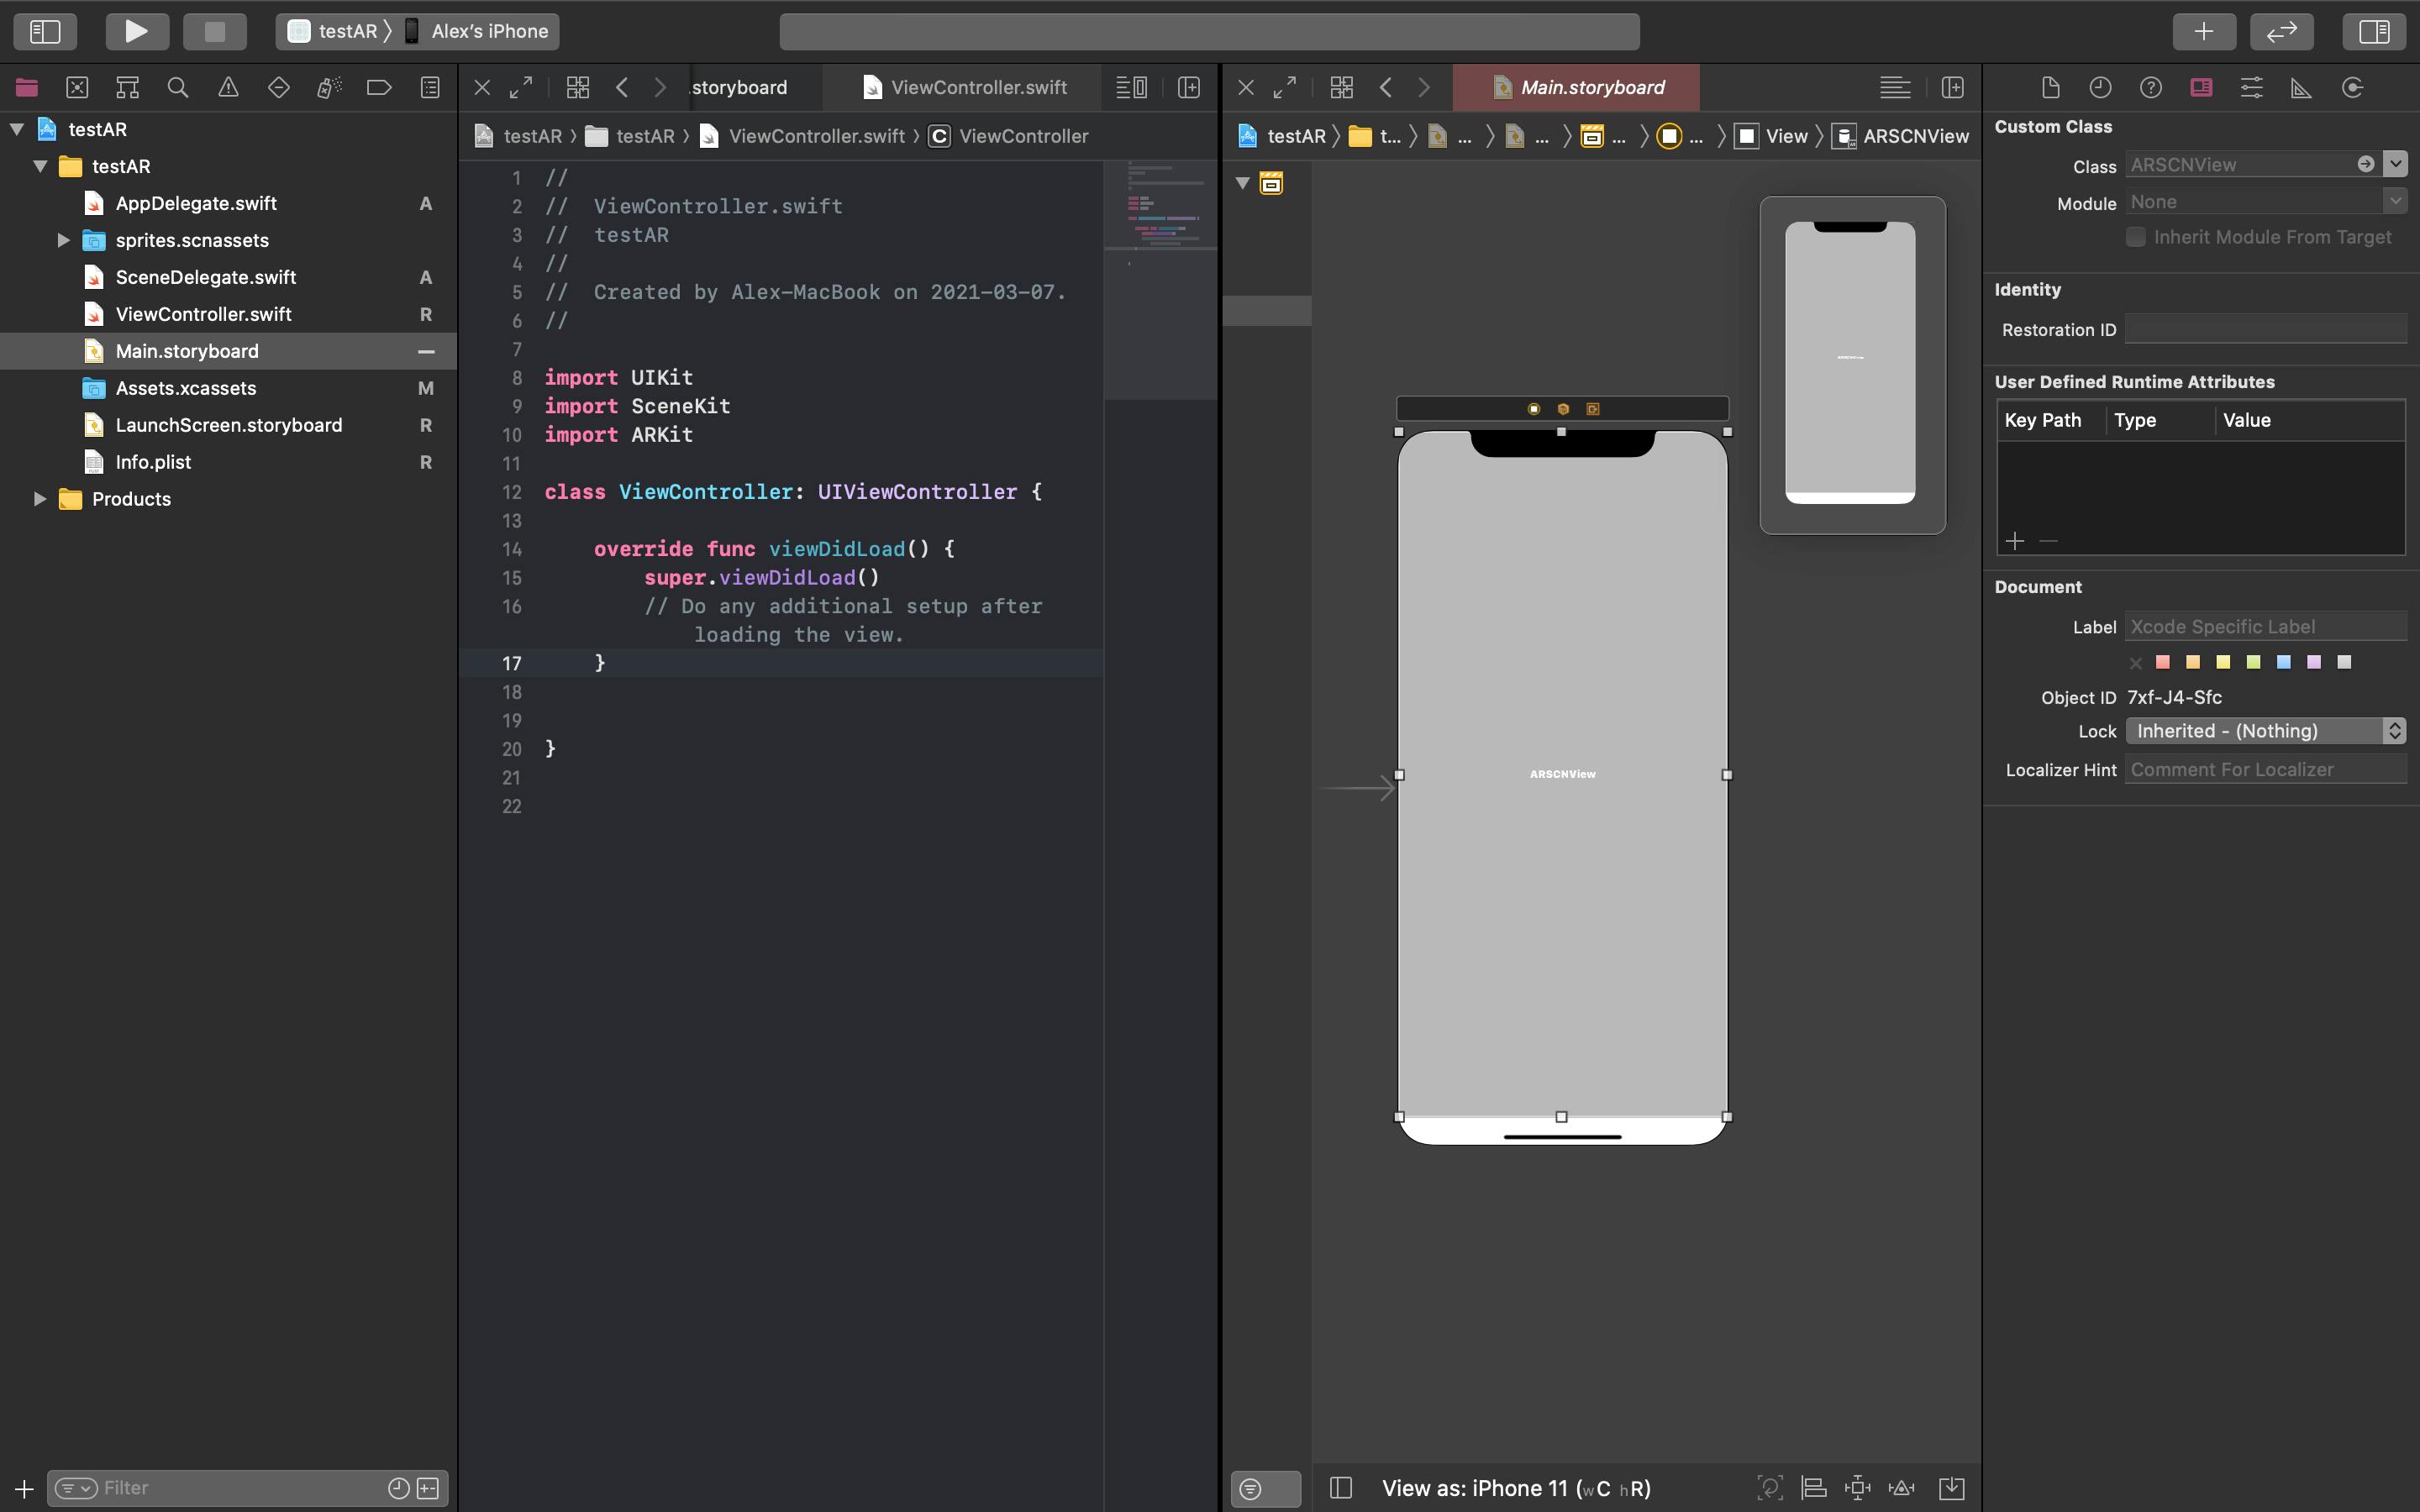
While hovering over the ARKit SceneKit View, holding ctrl and left-click will allow you to drag the view into your ViewController.swift file to produce an outlet.
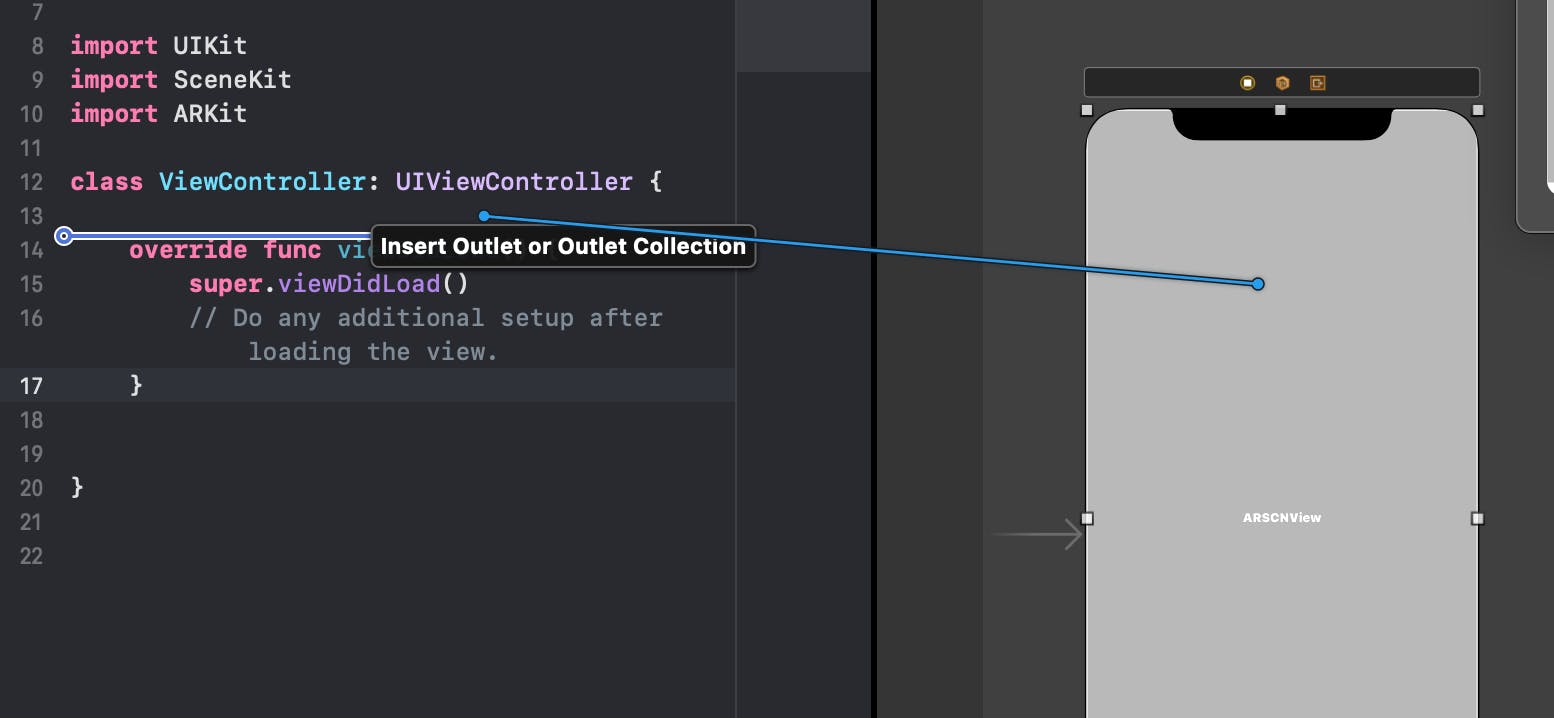
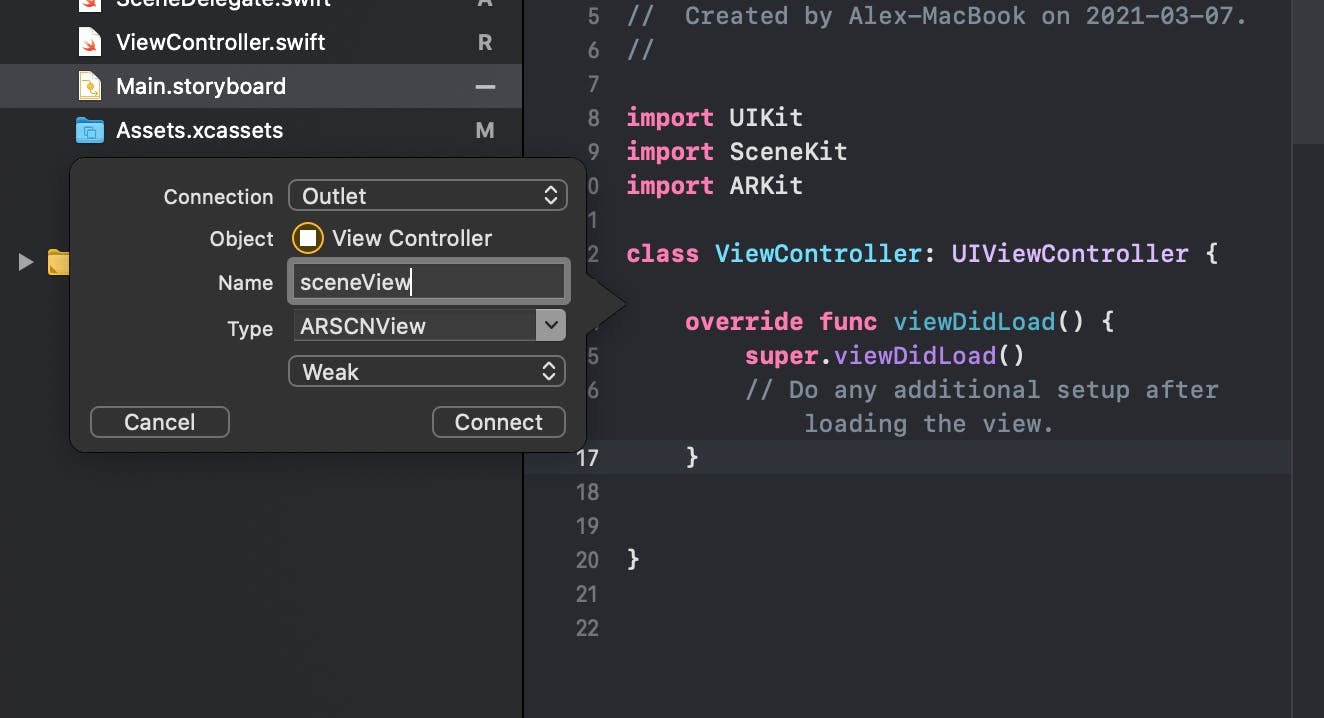
Once the prompt comes up, make sure Outlet is selected and name it appropriately. I called mine sceneView. Press Connect.
Time to code
Import these three libraries. These should be entered before the class declaration.
import UIKit
import SceneKit
import ARKit
In the class declaration, you need to add the ARSCNViewDelegate protocol. Your class should look like this.
class ViewController: UIViewController, ARSCNViewDelegate {
In viewDidLoad() there are only a few things to do to set up the scene. Firstly, we set the view's delegate, then we enable stats for testing purposes, then we create a new scene using the scene asset we created earlier, then we simply add the scene to the sceneView. That's all you're doing in this function.
override func viewDidLoad() {
        super.viewDidLoad()

        // Set the view's delegate
        sceneView.delegate = self

        // Show statistics such as fps and timing information
        sceneView.showsStatistics = true

        // Create a new scene
        let scene = SCNScene(named: "art.scnassets/test.scn")!

        // Set the scene to the view
        sceneView.scene = scene
}
Override the viewWillAppear() function. Once overridden, we're basically adding the Images we uploaded as references for the AR. Make sure that you're using the right folder name in the inGroupNamed property. Finally, we run the view's session with the configuration we just setup.
override func viewWillAppear(_ animated: Bool) {
        super.viewWillAppear(animated)

        // Create a session configuration
        let configuration = ARImageTrackingConfiguration()
        guard let arReferenceImages = ARReferenceImage.referenceImages(inGroupNamed: "AR Resources", bundle: nil) else { return }
        configuration.trackingImages = arReferenceImages
        sceneView.session.run(configuration)

        // Run the view's session
        sceneView.session.run(configuration)
}
Create a renderer() function(make sure you have all the right properties as well). Name it something that makes sense. This is code to make your image turn into a specific video. The code is pretty self-explanatory. If you have any questions, please leave a comment!
func renderer(_ renderer: SCNSceneRenderer, didAdd node: SCNNode, for anchor: ARAnchor) {
        guard anchor is ARImageAnchor else { return }

        guard let card = sceneView.scene.rootNode.childNode(withName: "card", recursively: false) else { return }
        card.removeFromParentNode()
        node.addChildNode(card)

        card.isHidden = false

        let videoURL = Bundle.main.url(forResource: "video", withExtension: "avi")!
        let videoPlayer = AVPlayer(url: videoURL)

        let videoScene = SKScene(size: CGSize(width: 720.0, height: 1280.0))

        let videoNode = SKVideoNode(avPlayer: videoPlayer)
        videoNode.position = CGPoint(x: videoScene.size.width / 2, y: videoScene.size.height / 2)
        videoNode.size = videoScene.size
        videoNode.yScale = -1
        videoNode.play()

        videoScene.addChild(videoNode)

        guard let video = card.childNode(withName: "video", recursively: true) else { return }
        video.geometry?.firstMaterial?.diffuse.contents = videoScene

}
Override the viewWillAppear() function. Once overridden, for best practice, we pause the sceneView's session.
override func viewWillDisappear(_ animated: Bool) {
        super.viewWillDisappear(animated)

        // Pause the view's session
        sceneView.session.pause()
}
Congratulations! You set up your image tracker AR app! Remember, in the renderer() function is where you want to do all your AR interactions. Test this out on your iPhone if you have an Apple developer account!
Thanks for reading! If you have any questions or feedback, please don't hesitate to leave one!
Sources: